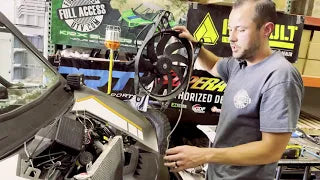
Full Access UTV Kawasaki KRX and KRX4 1000 Radiator Fan Kit Upgrade
Share
What’s up, guys! Cameron here from Full Access UTV, and today we’re finally walking through the long-awaited radiator fan kit upgrade for the Kawasaki KRX and KRX4. If you’ve ever worried about overheating or just want more confidence in your cooling system, this install is for you.
Why Upgrade Your KRX Fan?
The factory KRX comes with a fan that pushes around 600 CFM of airflow. While that’s fine under normal use, it often falls short when you’re pushing the machine hard in the desert, crawling through tight trails, or riding in high heat.
Our Full Access UTV Fan Kit Upgrade bumps that up to around 1,300 CFM that’s more than double the airflow. Paired with a precision-fit aluminum shroud, O-rings, and a sealed SPAL fan motor, this kit is built to handle tough conditions and keep your engine temps in check.
Tools You’ll Need
Before we dive in, here’s the short tool list for this job:
-
10 mm socket
-
12 mm socket
-
Push-pin pliers (you can grab these on our site)
That’s really it—you’re ready to tear in.
Step 1: Strip the Plastics & Access the Radiator
We’re working with a 2023 KRX4, but this process is nearly identical on earlier years. Start by removing the front plastics and accessing the radiator area.
-
Remove the push pins the front two plastic panels in place.
- Remove the 2 bolts holding the bar into the frame and the single bolt holding the brake fluid reservoir to the bar.
-
Disconnect the sway bar brackets to make room for tools. This is a little tricky for the back bolts.
-
Pro tip: You can drill small access holes for quicker ratchet access if you want to make future installs easier.
Step 2: Remove the Factory Fan & Shroud
With the plastics out of the way:
-
Unbolt the stock fan shroud—four bolts on top, four on the bottom.
- Remove the grommets and spacers (save them as you will be reusing them with the new fan shroud)
-
Disconnect the electrical plug for the fan and remove the vent tube. (Our upgraded fan is sealed, so you won’t be reusing that.)
-
Carefully shimmy the stock fan out. It’s bulkier than our upgrade, so you’ll need to maneuver it past the brake fluid reservoir and wiring.
Step 3: Prep the Radiator for the New Kit
Now that the old fan is out, it’s time to prep:
-
Reinstall the factory grommets.
-
Install the new O-rings (included in the kit) behind the grommets for a snug, vibration-free fit.
-
Re-seat the spacers so the new shroud sits perfectly flush.
Step 4: Install the Full Access UTV Fan Kit
Here’s where it gets good:
-
Slide the new aluminum shroud and SPAL fan into place (cord towards the passenger side for the electrical connection).
-
Because it’s a lower-profile design, this part is easier than removing the old one.
-
Line up the grommets, spacers, and mounting points.
-
Reinstall the bolts and snug everything up before final torquing.
Once the shroud is locked in, re-attach the sway bar, brake fluid reservoir, and any zip-tied wiring you moved out of the way.
Step 5: Electrical & Fuse Upgrade
Final step is making sure the new fan gets the right power:
-
Plug in the new fan’s electrical connector.
-
In the rear fuse box (behind the back seat), replace the stock fan fuse with the upgraded thermal fuse provided in the kit.
-
Snap everything back into place, reinstall your plastics, grill, and hood.
Results: Cooler, Stronger, Reliable
With the new fan installed, you’ve got nearly double the airflow, a sealed motor that won’t fail in water or mud, and a precision shroud that forces air exactly where it needs to go.
The end result? A KRX that runs cooler, cycles less often, and gives you peace of mind whether you’re out in the desert at 100°F or crawling through slow trails with no airflow.
Final Thoughts
This upgrade is one of the best insurance policies you can do for your KRX or KRX4. The stock fan has been known to fail, and when it does, it can take out the charging system—or worse, your engine.
With the Full Access UTV fan kit, you’ll have the last fan you’ll ever need.
Stay tuned—we’ve got plenty more installs and product breakdowns coming. Don’t forget to subscribe to our YouTube channel and check out the fan kit on our site if you’re ready to make the upgrade.
